iPasscode Unlocker
Unlock iPhone & iPad without passcode
Congratulations! You get a 20% discount now. It's available to purchase any Joyoshare product. Please make sure you use it during the valid period from December 26 to January 10.
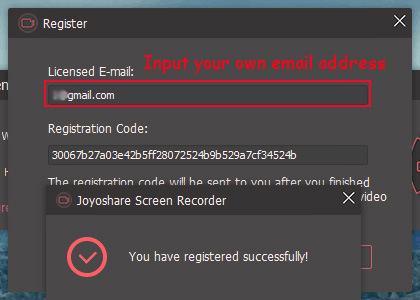
Firstly, click the setup file of Joyoshare Screen Recorder and install it on your PC. Then click top menu bar > Register in the upper right corner to load the registration window. Enter your email address and the license key "30067b27a03e42b5ff28072524b9b529a7cf34524b" to make it the full version.
Select recording mode next to the red REC button, "Record video and audio" or "Record audio". Next, designate the capturing screen size in Capture Area. Click the "+" button and you'll get the recording window popped up. You can set it as full screen, customized size or others.

By default, Joyoshare Screen Recorder will record desktop video with audio, including system sound and microphone voice simultaneously. To disable the audio recording, you can click the audio icons from the capture window.
Simply click the "settings" icon at bottom right corner, you'll be allowed to customize recording settings according to your own needs. Here you can set output file folder, output video/audio format, create recording shortcuts, embed watermark, add scheduled recording tasks and more.

Prepare what you want to record. Afterwards, simply click on the REC button to let it record the screen for you without losing any quality. You can also cut video during the recording process by hitting the scissor icon or pause to skip unwanted content.

To quit the recording, simply click the "stop" icon next to "pause" button. Then you can preview the recorded files in History window. Edit the name and ID3 tags of the recordings in the way you like.